What is GTM? Comprehensive knowledge about Google Tag Manager
What is GTM?
GTM stands for Google Tag Manager, a free tool from Google that helps manage and add marketing tags (tracking codes or scripts) to your website (or mobile app) without the need to modify the code directly.
Normally, websites need to add different codes to track conversion rates, clicks, on-site time, bounce rates, and more.
Benefits of GTM
With Google Tag Manager, you can easily add and manage all your scripts from a single, independent dashboard.
It comes with pre-built tag templates for Google Analytics, Ads, DoubleClick, and more. The tag manager also works with various third-party analytics tools and tracking platforms.
Additionally, you can custom HTML to add any code or tracking scripts you desire.
This saves you time by embedding and removing tags from your code while managing them from a single dashboard.
Moreover, all the scripts are loaded with just one script.
For marketers, adding tracking codes is a daily task, and sometimes you may not have access to the technical side or the right to edit the website. In such cases, Google Tag Manager is an excellent solution.
With the information above, I hope you now find Google Tag Manager interesting!
To assist with this article, I will guide you through how to set up Google Analytics using Google Tag Manager.
It’s important to note that this guide is for self-hosted WordPress.org sites.
If you don’t have a WordPress site, check out our guide on how to install WordPress on your hosting.
See more products: Buy advertising accounts
Setting up Google Tag Manager
Registration
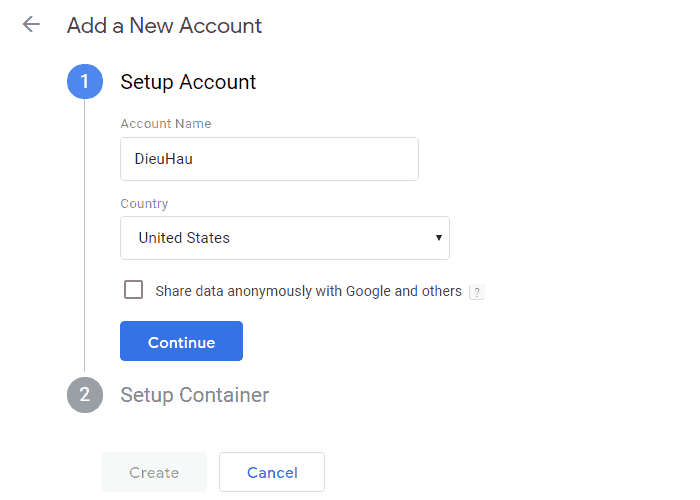
First, go to the GTM website and register with the same Gmail account you used for Google Analytics.
On the Google Tag Manager homepage, enter the account name and click continue.
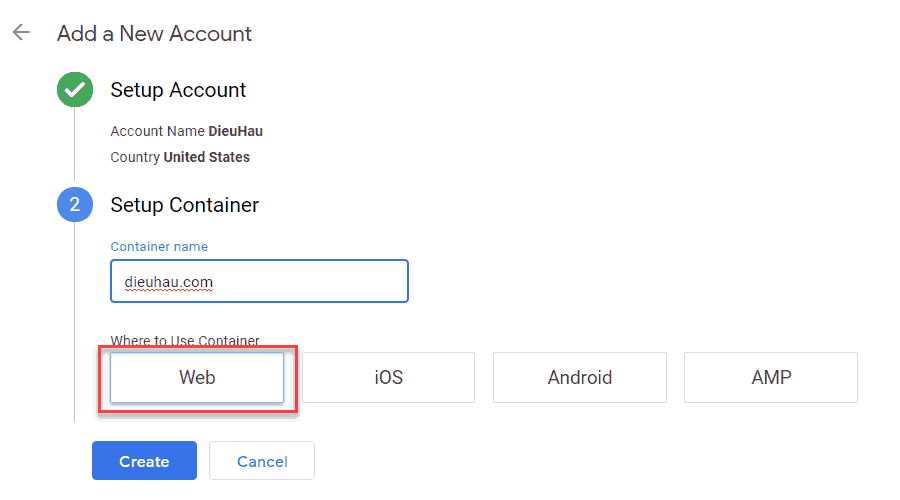
Next, fill in your website name and select the platform (Web). Click “Create,” and a tab with terms and conditions will appear. Select “YES.”
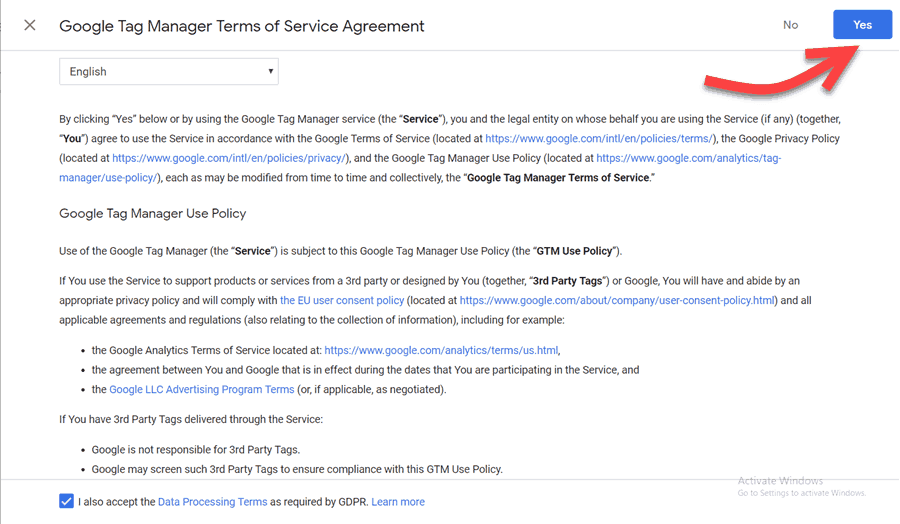
Check the box at the bottom to accept the terms and click “YES.”
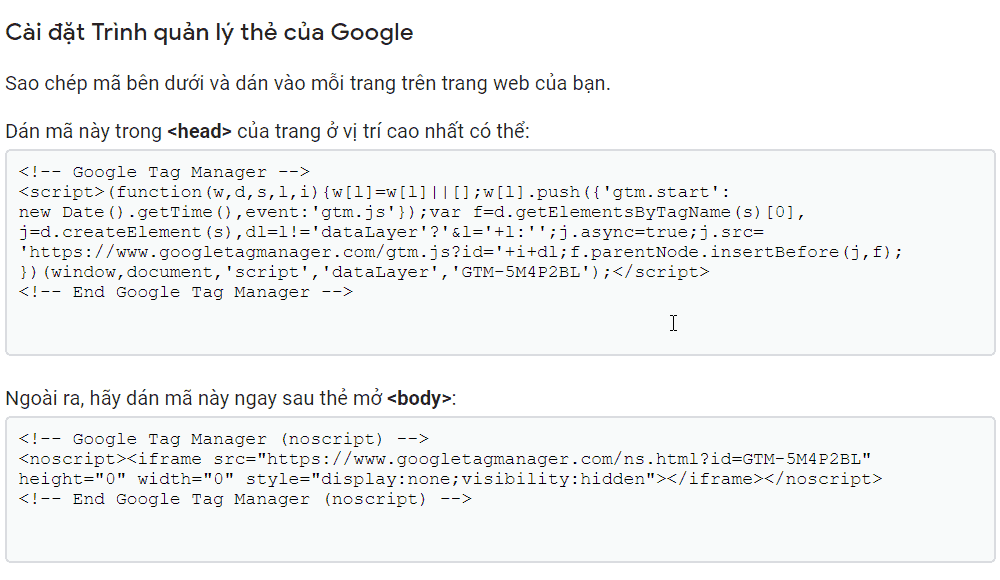
A setup guide for Google Tag Manager will appear. There are two ways to install the code:
-
You can insert the first code snippet into the head tag.
-
Or insert the second code snippet into the body (the method I usually use is adding it to the header).
This is the interface after you’ve successfully set up Google Tag Manager.
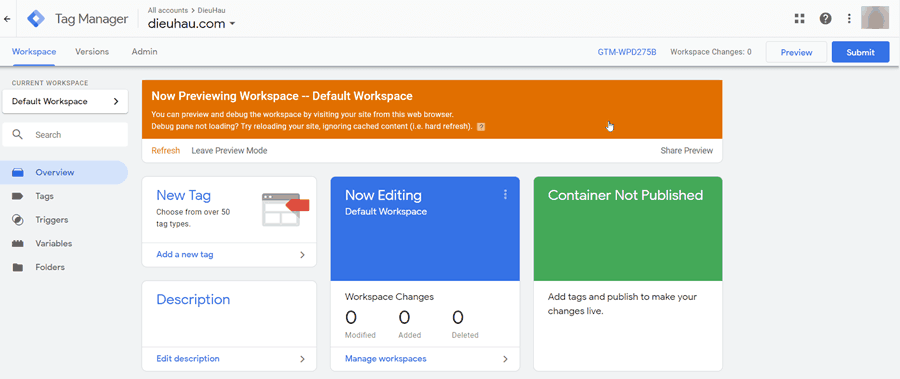
Setting up Google Tag Manager
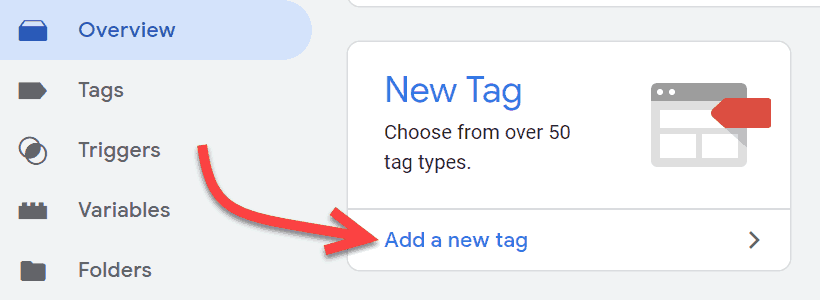
Create a New Tag
Now that your Google Tag Manager account is ready, the next step is to add a new tag. You can do this by clicking on “Add a new tag.”
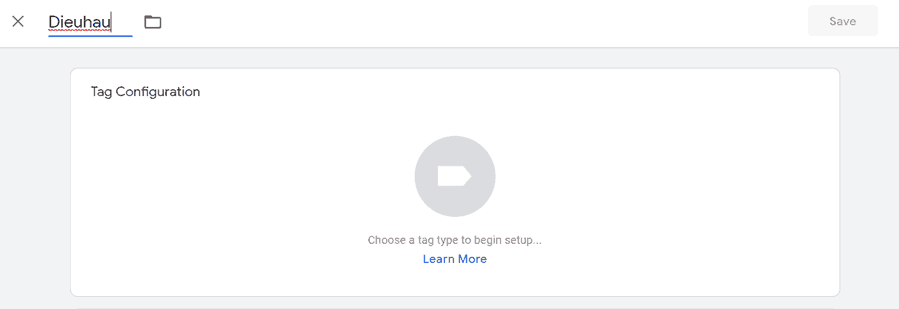
A “Tag Configuration” window will appear for you to choose the settings and give the tag a name based on your preference.
There are over 90 pre-configured templates for you to choose from. They include Google platforms and third-party services.
Now, let’s choose Google Analytics. You can also choose multiple tags or custom HTML if you wish.
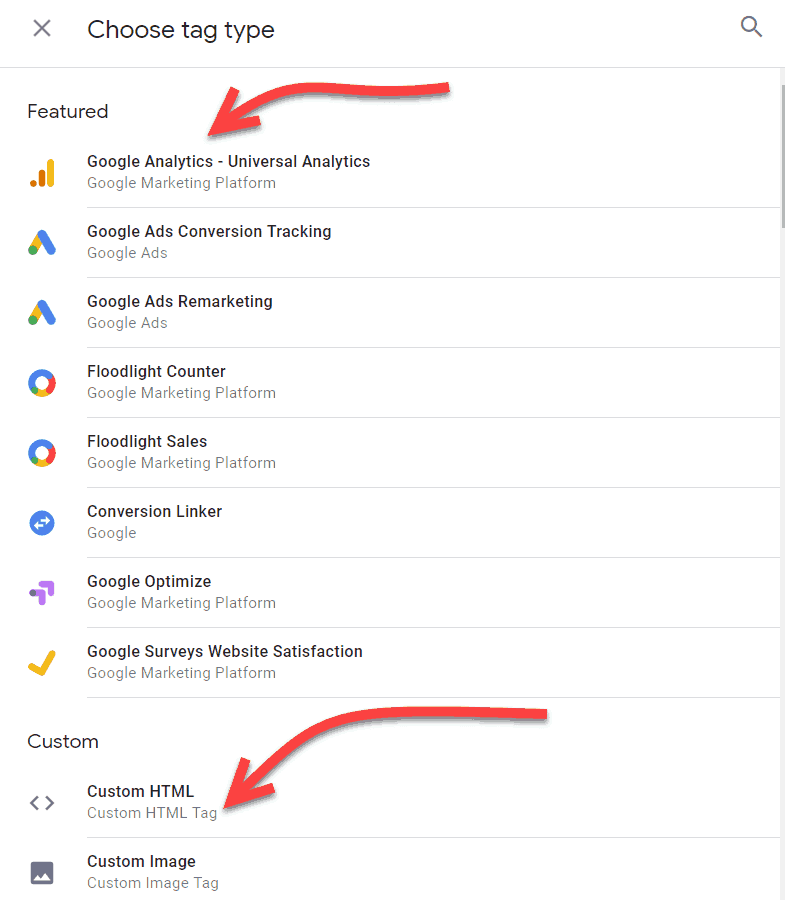
Once you select Google Analytics – Universal Analytics, you will be asked to provide your Analytics Tracking ID.
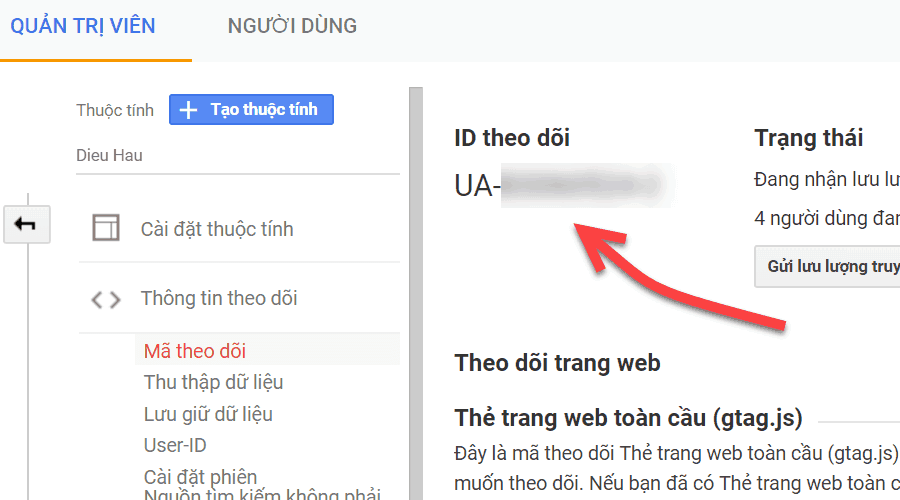
Copy Tracking Code
This Tracking ID is a code that allows Google to identify your website. You can find this ID by logging into your Google Analytics account and going to the Admin tab.
Select your account and property, then click on “Tracking Info” to expand that section. You will see the Tracking Code link.
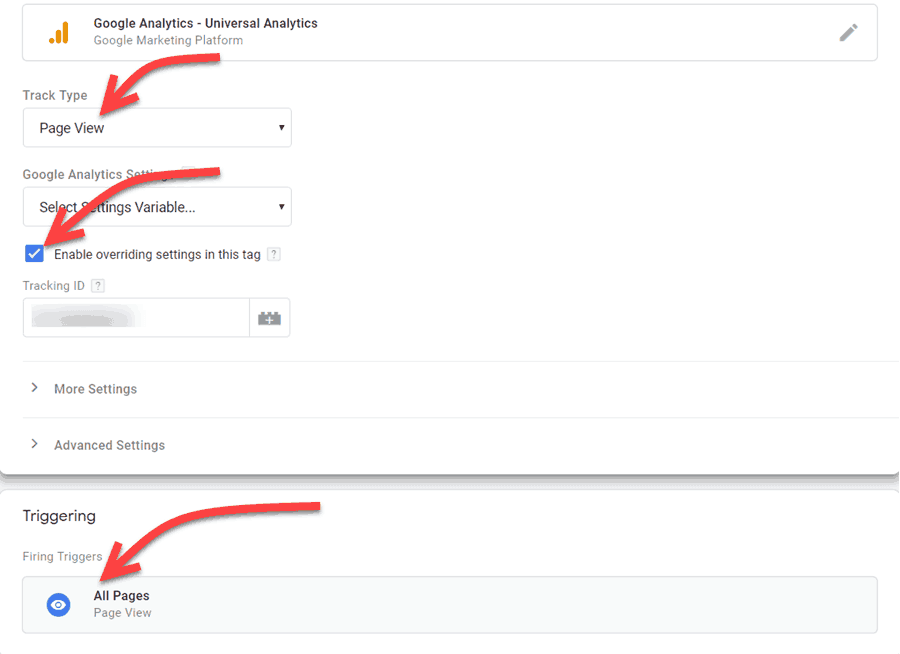
-
Track Type: Choose “Page View.”
-
Check the box “Enable overriding settings in this tag.”
-
Tracking ID: Enter the UA code you copied earlier.
-
Triggering: Select “All pages.”
How to Add Tag Manager Code to WordPress
The first step you may need to do is install and activate the “Insert Headers and Footers” plugin. After activation, go to Settings » Insert Headers and Footers.

Paste the Tag Manager code into the header section and click “Save” to store the changes.
If you prefer not to set up a plugin, you can add the Google Tag Manager code directly to your WordPress theme or child theme.
Simply go to the header.php file and paste the code right after the opening <head> tag.
See more products: Buy advertising accounts
Exit Preview Mode and Submit
Tags in Google Tag Manager will not be public until you choose to submit them. Go to the Google Tag Manager dashboard and click “Submit.”
You can also preview your website, and Google Tag Manager will show you the tags activated on each page view.
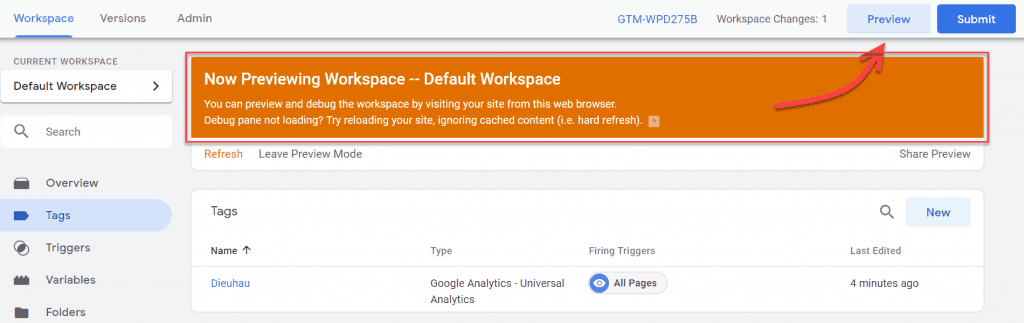
Click “Preview,” and the preview feature will appear directly in your browser.

Now, everything is set up.

Everything you’ve set up so far is still in “Preview Mode.” You need to click “Leave Preview Mode” and then “Submit” to complete the process.
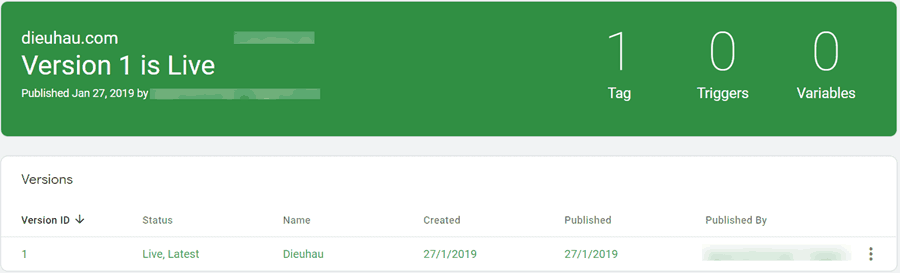
That’s it! You have successfully set up and configured Google Tag Manager for your WordPress site.
If you need the most reputable payment method and advertising account provider, you can message the fanpage buybm365.com-Ads to receive advice from HT Media. In addition, you can follow the articles. Latest articles related to our Digital Marketing.


